Windows10正式版系統對圖標使用了緩存的方法來加快顯示速度。不過,用戶發現偶爾圖標緩存也會出現一些問題。比如圖標顯示不正常,縮略圖出現無法顯示、錯位或不刷新等。此時,我們可以通過重建緩存來進行修復。下面就隨小編一起來學習一下Win10手動刪除圖標緩存重建緩存的方法。
手動重建Win10圖標緩存
Windows10與之前版本Windows的原理差不多,圖標緩存是存儲在 IconCache.db 這個特殊的數據庫文件當中的。如果要重建Windows10圖標緩存需要如下步驟。
Windows7和Windows8的圖標緩存文件是存儲到C:Users用戶名AppDataLocal 文件夾當中的,而Windows10和Windows8.1的圖標緩存文件已經被更改到了如下路徑:
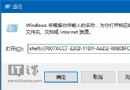
%userprofile%AppDataLocalMicrosoftWindowsExplorer(復制到運行中可快速打開)
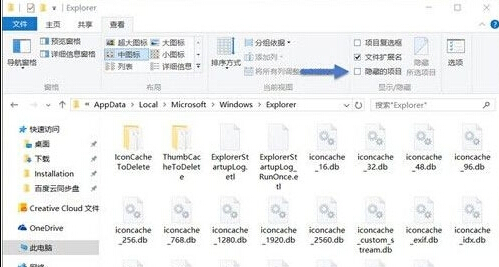
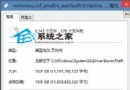
在上述文件夾中你會看到像 iconcache_32.db、iconcache_48.db、iconcache_96.db、iconcache_256.db、 iconcache_1024.db、iconcache_1280.db、iconcache_1600.db、iconcache_1920.db、 iconcache_2560.db、iconcache_exif.db、iconcache_idx.db、iconcache_sr.db、 iconcache_wide.dd、iconcache_wide_alternate.db 這樣的文件。
將這些文件全部刪除,就可以重建 Windows 10 圖標緩存了。當然,如果 Windows 資源管理器正在使用當前文件,可能會導致部分文件無法刪除。此時,我們可以將如下代碼復制保存成一個 xxx.bat 文件,再以管理員權限執行即可。
cd /d %userprofile%AppDataLocalMicrosoftWindowsExplorer taskkill /f /im explorer.exe attrib -h iconcache_*.db del iconcache_*.db /a start explorer pause
執行以上批處理會重啟 Windows Explorer,因此桌面會消失一下。執行完之後 Windows 10 圖標緩存數據庫就被刪除了,然後 Windows 10 會自動為我們重建圖標緩存。
手動重建Win10縮略圖緩存
Windows 10一般情況下會生成圖片、視頻、音樂和文檔的縮略圖,其路徑與 Windows 10 圖標緩存文件一致,文件名類似 thumbcache_*.db。如果你的縮略圖不顯示或者不刷新可以嘗試通過如下批處理來清理,其步驟和清除圖標緩存一致。
cd /d %userprofile%AppDataLocalMicrosoftWindowsExplorer taskkill /f /im explorer.exe attrib -h thumbcache_*.db del thumbcache_*.db /a start explorer pause
以上就是系統城小編為大家介紹的Win10下縮略圖及圖標緩存的刪除重建方法了