Windows XP Windows 7 Windows 2003 Windows Vista Windows教程綜合 Linux 系統教程
Windows 10 Windows 8 Windows 2008 Windows NT Windows Server 電腦軟件教程
 Windows教程網 >> Windows 7系統教程 >> 關於Windows7系統教程 >> Win7合並或刪除"網絡位置"的方法

Win7合並或刪除"網絡位置"的方法

日期:2017/4/18 10:57:13      編輯:關於Windows7系統教程

  許多Win7用戶都發現在第一次使用網絡的時候都會收到提示選擇是何種網絡,通常情況下用戶不會使用到網絡位置,那麼合並或刪除過多的網絡位置就是十分必要的,下面小編就為大家詳細介紹。

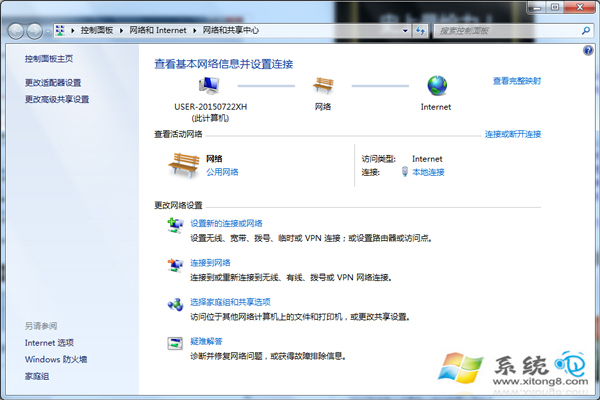
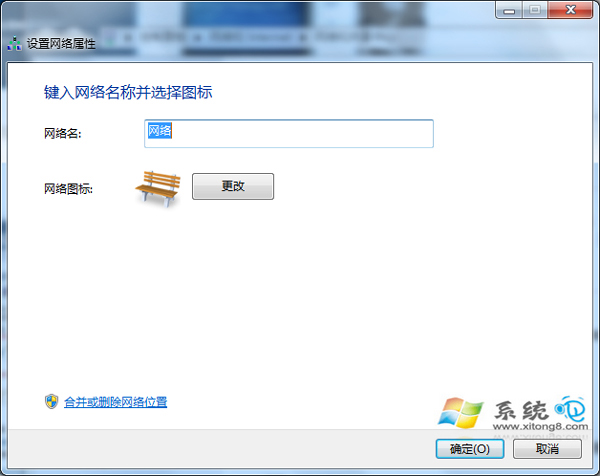
  1、找到控制面板中心,打開控制面板進入到“網絡和共享中心”,展現出的窗口中找到“網絡”,點開其網絡圖標。

  2、進入網絡窗口後,點擊最下方的“合並或刪除網絡位置”

  3、在彈出的合並或刪除網絡位置窗口中,選擇要合並或刪除的網絡位置,然後點擊下方的合並或刪除按鈕。

  以上就是在Win7系統中合並或刪除過多的網絡位置的方法,值得注意的是用戶要先選擇您要合並或刪除的網絡圖標,再最後點擊合並或刪除。

Copyright © Windows教程網 All Rights Reserved