IIS全稱Internet Information Services(互聯網信息服務),是Microsoft Windows的互聯網基本服務。在使用Window系統進行某些操作時,需要IIS的支持。與XP相比,Win7的優點就是它有自帶IIS的組件,而不需額外安裝。那麼Win7如何開啟IIS功能呢?現在就由小編和大家說一下Win7系統添加IIS功能的方法。
具體步驟如下:
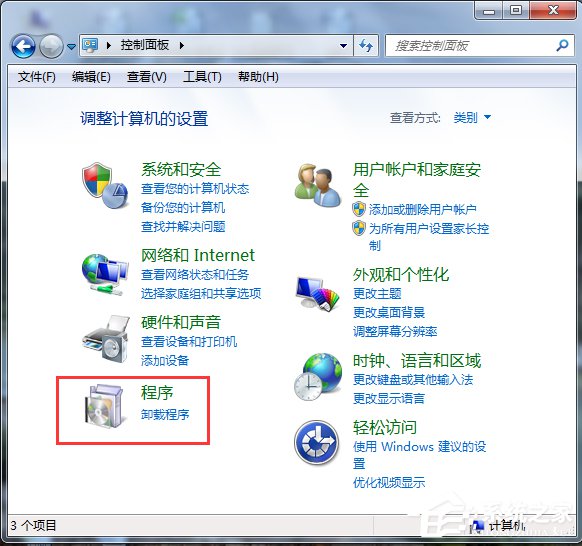
1、首先點擊“計算機”。
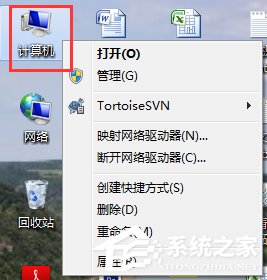
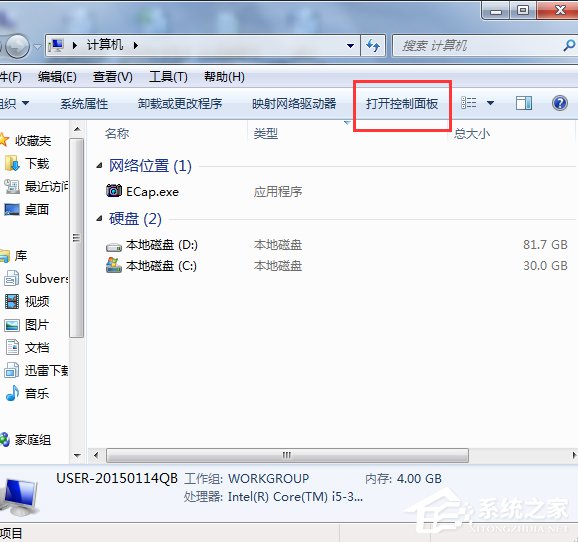
2、點擊“打開控制面板”。
3、點擊“程序”。
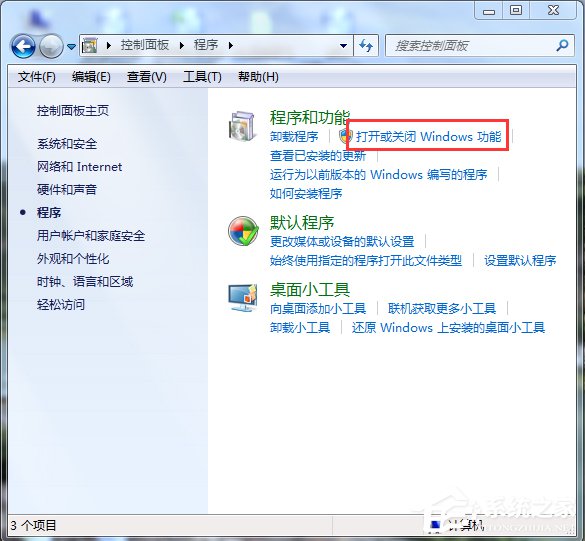
4、點擊“打開或關閉Windows功能”。
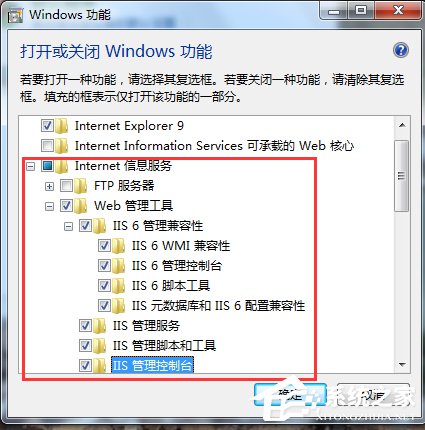
5、在彈出的對話框中按下圖箭頭操作將正方形框內都打上勾,然後點擊“確實”。
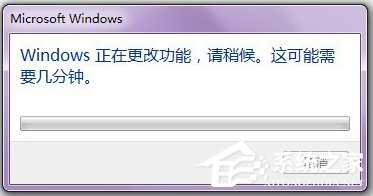
6、在此界面出現後,耐心等待幾分鐘。
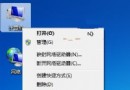
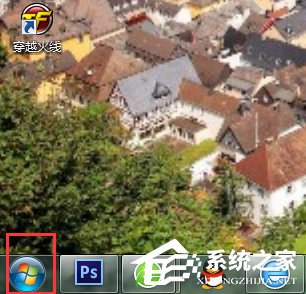
7、待其成功安裝後,回到桌面,點擊“開始”。
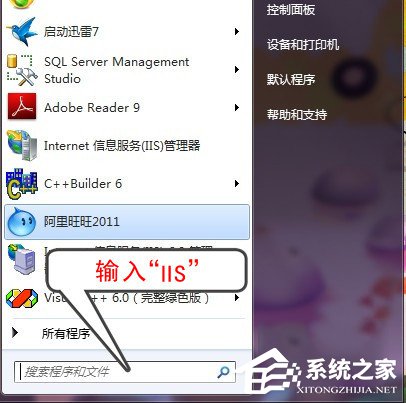
8、在搜索框中輸入“IIS”。
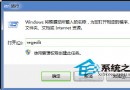
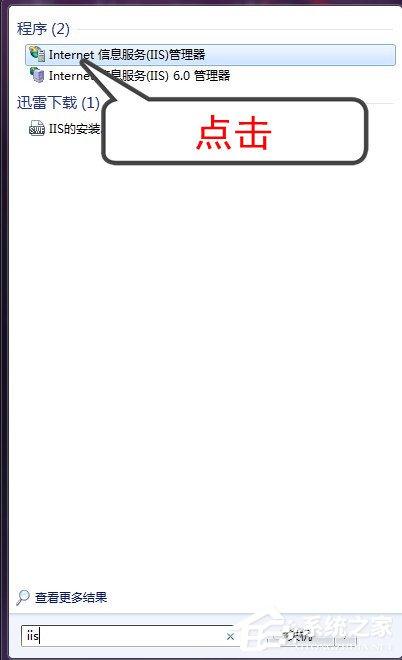
9、點擊“Internet信息服務(IIS)管理器”。
10、當出現如下界面時,說明你已經成功安裝“IIS”,此時你就可以用“IIS”對你的網站進行測試了。

Win7系統添加IIS功能的方法就給大家詳細介紹到這裡了。如你還不知道怎麼添加IIS功能的,可以先參考一下上述的內容,看了你就知道怎麼添加IIS功能了。希望在這裡能夠幫助到更多有需要的人。