筆者最近意外的發現 筆者的個人網站 http://tiankonguse.com/ 的很多文章被其它網站轉載,但是轉載時未聲明文章來源或參考自 http://tiankonguse.com/ 網站,因此,筆者添加此條聲明。
鄭重聲明:這篇記錄《ubuntu系統之難》轉載自 http://tiankonguse.com/ 的這條記錄:http://tiankonguse.com/record/record.php?id=677
心中再次想起那句話,既然自己選擇了這樣做,就要准備好承受做這件事的一切代價。
一次錯誤的記憶和操作,使得整個boot分區被刪除。
一次無意的撤銷操作,使得系統依賴錯誤。
先說說背景吧。
我的電腦安裝了三個系統: ubuntu12.04, ubuntu14.04 和 centOS。
其中 ubuntu12.04 是我一直使用的系統,上次裝完這個系統使用時長至少一年了吧。
ubuntu14.04 這個系統我把windows刪除的時候,使用這個系統覆蓋的。
centOS安裝也有半年了。
現在我的ubuntu12.04這個系統的磁盤不足了,於是我想刪除其它兩個系統。
於是我做了一個U盤版的GParted軟件。
sda1 是主分區(以前是windows7,現實在 ubuntu14.04了)。
sda3是我的D盤,ntfs格式。
sda4是一個ext4格式分區(boot分區)。
sda5是一個swap分區。
sda6是一個ext4格式的分區(ubuntu 12.04 分區)
sda7是一個ext4格式的分區(Home分區)。
sda8是一個swap分區。
sda9是一個ext4格式的分區(centOS系統)。
sda10是一個swap分區
看到這些分區,我想起一件事,當時安裝 ubuntu14.04的時候,為了系統的安全,我把boot,home和根分開了,分了三個分區。
於是我就果斷的把sda8和sda4刪了,後來想交換分區也沒算什麼用,於是把三個交換分區也刪了。對於home分區,我想再看看到底是不是,畢竟裡面可能有重要的文件。
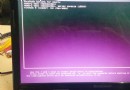
於是關機重啟,然後出現了久違的 grub rescue 錯誤。
第一行有個錯誤
/grub/i386pc/normal.mod not found.
還好,以前我遇到這個錯誤好多次,於是找到曾經的記錄http://tiankonguse.com/record/record.php?id=194。
但是執行到 insmod /boot/grub/normal.mod 時竟然提示找不到 normal.mod。
還好,我嘗試使用 insmod normal 試試,竟然成功了,原來現在的系統,改成 /boot/grub/i386-pc/normal.mod 了。
然後我興高采烈的執行 normal 命令。
但是執行後,提示
error symbol 'grub_term_highlight_color' not found。
怎麼會這樣呢?
於是使用360搜索一下。
找到這個論壇(http://forum.ubuntu.org.cn/viewtopic.php?t=458570).
說是系統的一個 bug, 需要使用 live 系統重裝 grub2 .
我做了一個ubuntu 系統的U盤。
然後把U盤裡的boot復制到我的那個 ubuntu 12.04 系統。
開機後還是 grub rescue, 然後使用上面的方法後竟然進去到U盤系統了。
原來grub還沒有更新。
然後更新的時候提示下面錯誤:
ubuntu@ubuntu:~$ sudo update-grub
/usr/sbin/grub-probe: error: failed to get canonical path of /cow.
ubuntu@ubuntu:~$ sudo grub-install /dev/sda
Path `/boot/grub' is not readable by GRUB on boot. Installation is impossible. Aborting.
然後我在ubuntu的一個論壇上找到一個方法(http://askubuntu.com/questions/197833/recovering-from-grub-rescue-crash)
sudo mount /dev/sdXY /mnt
sudo grub-install --root-directory=/mnt /dev/sdX

Where /dev/sdX is the disk where Ubuntu is installed, and /dev/sdXY is the partition on the disk where Ubuntu is installed. In other words, /dev/sdXY contains /boot and so on.

Use fdisk -l to verify the Ubuntu installation location.

但是我執行的時候,提示
ubuntu@ubuntu:~$ sudo mount /dev/sda /mnt
mount: /dev/sda already mounted or /mnt busy

在bug論壇看到各種解決方法,大家可以去看看(https://bugs.launchpad.net/ubuntu/+source/grub2/+bug/1289977)。
sudo fdisk -l
And find your Ubuntu partition (should be /dev/sda1 if it is the first partition)

sudo mount /dev/sda1 /mnt
sudo mount --bind /sys /mnt/sys
sudo mount --bind /proc /mnt/proc
sudo mount --bind /dev /mnt/dev
sudo chroot /mnt
Now reinstall Grub2

sudo apt-get install --reinstall grub2
blkid 查看各個分區的UUID
此時我突然意識到一個問題,我這是U盤,不是 live 系統,裡面的文件自然不全了。
於是我嘗試先修復另一個系統,結果可以了。
然後進入那個系統,把boot目錄全部拷貝過去。
重啟選擇這個系統,竟然進入的是新的系統。
此時我意識到一個問題,我的這個舊的系統有三個分區:根分區, boot 分區, home 分區。
那一定有一個地方來儲存這三個分區在那裡儲存,還真找到了。
執行這個命令
tiankonguse@tiankonguse:~$ sudo vi /etc/fstab可以看到分區的掛載點
下面的是我修復完的內容
# /etc/fstab: static file system information.
#
# Use 'blkid' to print the universally unique identifier for a
# device; this may be used with UUID= as a more robust way to name devices
# that works even if disks are added and removed. See fstab(5).
#
# <file system> <mount point>   <type>  <options>       <dump>  <pass>
# / was on /dev/sda1 during installation
UUID=65a7fc16-a481-4f77-97b6-59731143f930 /               ext4    errors=remount-ro 0       1
# swap was on /dev/sda12 during installation
#UUID=7b08a45e-34f2-4ea2-900e-579c5a3bddca none            swap    sw              0       0
# swap was on /dev/sda6 during installation
#UUID=99d228d4-f996-4970-ba48-f6950e3a0b69 none            swap    sw              0       0

# /home was on /dev/sda7 during installation
UUID=aef790b3-32e8-4060-8542-bafeedcbac98 /home           ext4    defaults        0       2
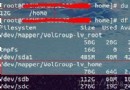
關於 UUID 可以使用上面提到的blkid來查詢
tiankonguse@tiankonguse:~$ sudo blkid
/dev/sda1: UUID="65a7fc16-a481-4f77-97b6-59731143f930" TYPE="ext4"
/dev/sda5: LABEL="E" UUID="3816A47016A43134" TYPE="ntfs"
/dev/sda6: UUID="aef790b3-32e8-4060-8542-bafeedcbac98" TYPE="ext4"
配置為自己需要的,舊的系統的home目錄就掛到新的系統上去了。