L2TP VPN在裝有WindowsXP系統的電腦中如何使用?鑒於大多數人在討論這個問題,辦公族特意為大家推薦下面這篇文章,希望能幫到大家。
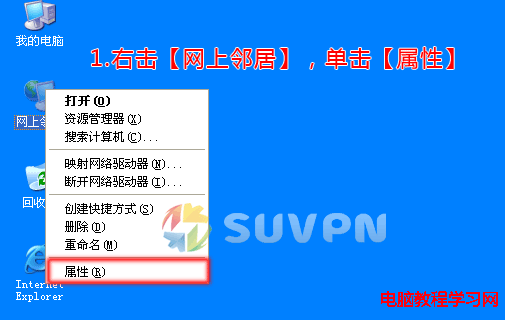
 右擊【網上鄰居】,然後單擊【屬性】
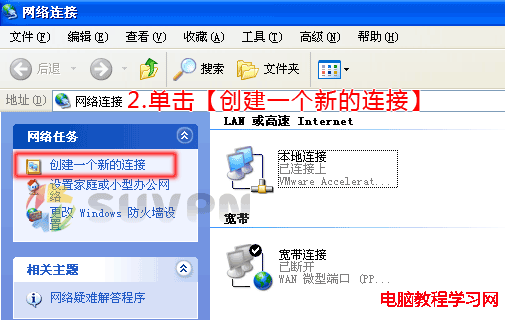
 單擊【創建一個新的連接】
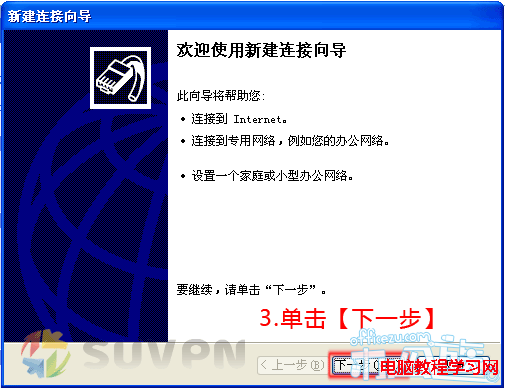
 單擊【下一步】
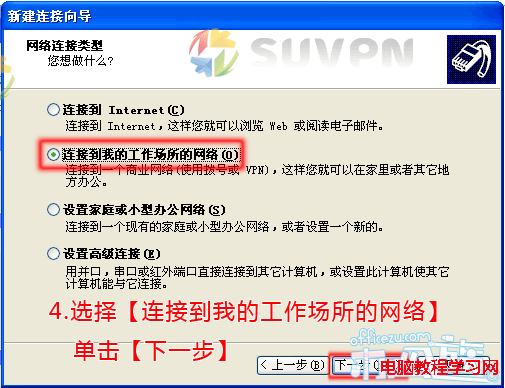
 選擇【連接到我的工作場所的網絡】,然後單擊【下一步】
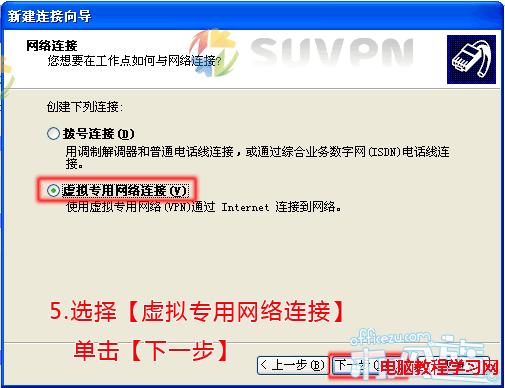
 選擇【虛擬專用網絡連接】,然後單擊【下一步】
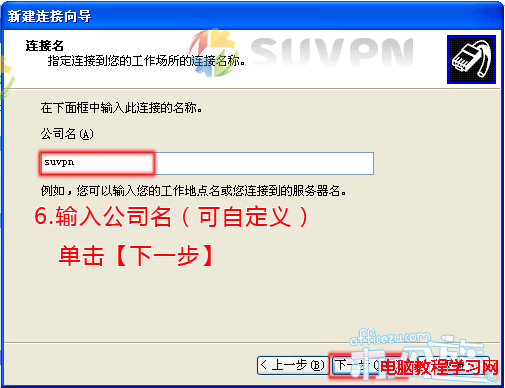
 輸入公司名,如:suvpn 可以自定義,然後單擊【下一步】
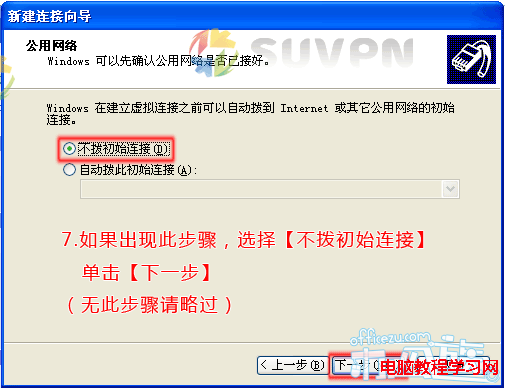
 如果出現此步驟,選擇【不撥初始連接】,單擊【下一步】,如無此步驟,請略過!
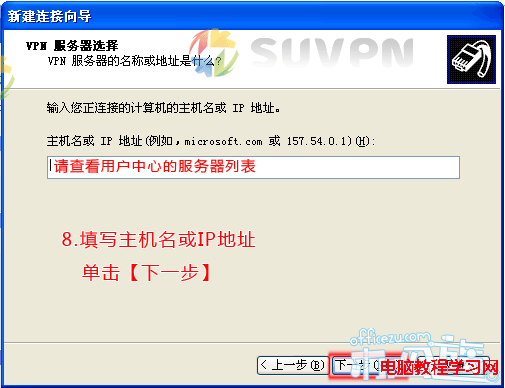
 設置【主機名或IP地址(服務器列表請點擊這裡查看)】,單擊【下一步】
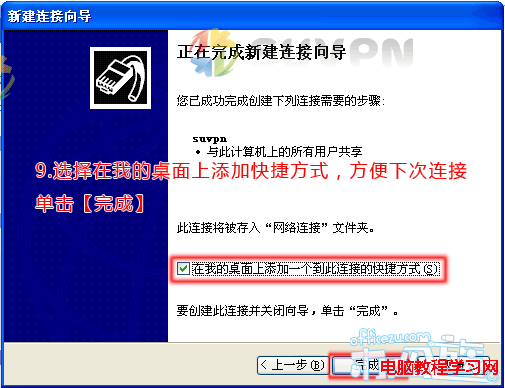
 勾選【在我的桌面上添加一個到此連接的快捷方式】,方便下次連接,然後單擊【完成】
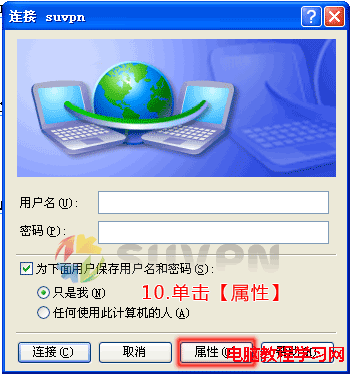
 單擊【屬性】
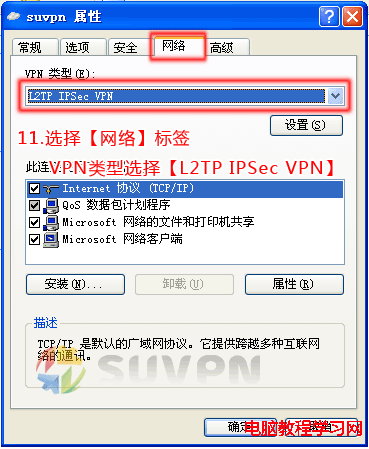
 選擇【網絡】標簽,VPN類型選擇【L2TP IPSec VPN】
 選擇【安全】標簽,點擊【IPSec設置...】,在彈出的IPSec設置窗口中勾選使用預共享的密鑰作身份驗證【密鑰:suvpn】,然後單擊【確定】

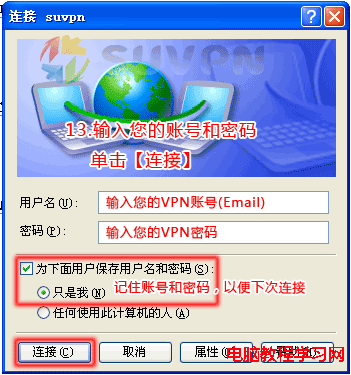
 設置【用戶名(您在SUVPN上注冊的email)】、【密碼(您在SUVPN上注冊的密碼)】,勾選【為下面用戶保存用戶名或密碼】方便下次連接,然後單擊【連接】即可連接VPN網絡。