Windows XP Windows 7 Windows 2003 Windows Vista Windows教程綜合 Linux 系統教程
Windows 10 Windows 8 Windows 2008 Windows NT Windows Server 電腦軟件教程
 Windows教程網 >> Windows教程綜合 >> 關於windows >> xp系統如何開啟cpu二級緩存?xp系統開啟cpu二級緩存的兩種方法

xp系統如何開啟cpu二級緩存?xp系統開啟cpu二級緩存的兩種方法

日期:2017/2/8 18:08:27      編輯:關於windows

方法一:

Windows優化大師打開二級緩存的操作步驟:

1、啟動Windows優化大師,選擇“系統性能優化”;

軟件名稱:
Windows優化大師 V7.99 Build 13.0604 綠色去廣告特別版
軟件大小:
5.64MB
更新時間:
2013-06-07

2、在“文件系統優化”中,最上面就是關於CPU二級緩存的設置項。

3、拖動滑塊到相應的位置後,保存設置並重新啟動計算機。

方法二:

注冊表法打開二級緩存的操作步驟:

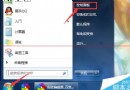
1、點擊“開始——運行”輸入“Regedit”命令後按回車,打開注冊表編輯器。

運行

2、依次展開以下注冊項HKEY_LOCAL_MACHINE\System\CurrentControlSet\Control\SessionManager\Memory Management。

3、在右側窗口中雙擊“SecondLevelDataCace”的選項,然後在彈出的窗口中直接填入當前計算機所使用的CPU的二級緩存容量即可。

以上就是對Windowsxp系統開啟cpu二級緩存的兩種方法全部內容的介紹,想要發揮cpu最大效率的朋友,可以任選一種方法進行操作!

Copyright © Windows教程網 All Rights Reserved