1, 准備工作
下載最新版本的apache軟件httpd-2.2.17.tar.bz2
下載mysql軟件mysql-5.1.50-linux-i686-glibc23.tar.gz
下載php軟件php-5.3.5.tar.bz2
下載wordpress博客安裝軟件 wordpress-3.0.4-zh_CN.zip
下載論壇安裝軟件phpwind_GBK_8.3.zip等軟件
2, 安裝apache軟件
(1) 解壓apache軟件
#tar –jxf httpd-2.2.17.tar.bz2
#cd httpd-2.2.17
(2) 配置源碼./configure –prefix=/usr/local/apache –sysconfdir=/etc/httpd –enable-so –enable-modules=most –enable-mod-shared=most –enable-proxy –enable-rewrite
其中 –prefix=/usr/local/apache 指的是apache的安裝位置為/usr/local/apache
--sysconfdir=/etc/httpd 設置apache的配置文件的存放位置
--enble-so 讓appache加載dso功能
--enable-modules=most 讓apache加載大部分的模塊
--enable-mod-shared=most 將大部分的模塊編譯為dso
--enable-rewrite 啟用apache的重載功能
--enable-proxy 啟用apache的代理功能
(3) 編譯apache源碼
#make
(4) 安裝apache
#Make install
(5)設置環境變量和apache的庫文件頭文件幫助文件等的鏈接
A,設置環境變量
#vim /etc/profile 打開/etc/profile文件
添加一行 PATH=$PATH:/usr/local/apache/bin保存退出
B,鏈接apche頭文件
#ln –sv /usr/local/apache/include /usr/include/httpd
C,鏈接apache庫文件到系統庫文件
#vim /etc/ld.so.d/httpd.conf
在文檔裡輸入 /usr/local/apache/lib
保存並退出
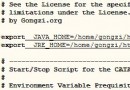
(6)創建httpd的啟動文件
Vim /etc/rc.d/init.d/httpd
在文件裡面輸入以下代碼
#!/bin/bash
. /etc/rc.d/init.d/functions
apachectl='/usr/local/apache/bin/apachectl'
httpd='/usr/local/apache/bin/httpd'
prog=httpd
pidfile=${PIDFILE-/usr/local/apache/logs/httpd.pid}
lockfile=${LOCKFILE-/var/lock/subsys/httpd}
RETVAL=0
start() {
echo -n $"Starting $prog: "
daemon --pidfile=${pidfile} $httpd $OPTIONS
RETVAL=$?
echo
[ $RETVAL = 0 ] && touch ${lockfile}
return $RETVAL
}
stop() {
echo -n $"Stopping $prog: "
killproc -p ${pidfile} -d 10 $httpd
RETVAL=$?
echo
[ $RETVAL = 0 ] && rm -f ${lockfile} ${pidfile}
}
reload() {
echo -n $"Reloading $prog: "
if ! $httpd -t >&/dev/null; then
RETVAL=$?
echo $"not reloading due to configuration syntax error"
failure $"not reloading $httpd due to configuration syntax error"
else
killproc -p ${pidfile} $httpd -HUP
RETVAL=$?
fi
echo
}
# See how we were called.
case "$1" in
start)
start
;;
stop)
stop
;;
status)
status -p ${pidfile} $httpd
RETVAL=$?
;;
restart)
stop
start
;;
condrestart)
if [ -f ${pidfile} ] ; then
stop
start
fi
;;
reload)
reload
;;
graceful|help|configtest|fullstatus)
$apachectl $@
RETVAL=$?
;;
*)
echo $"Usage: $prog {start|stop|restart|condrestart|reload|status|fullstatus|graceful|help|configtest}"
exit 1
esac
exit $RETVAL
這樣我們就可以使用
Service httpd {start|stop|restart|reload|statue}來啟動關閉httpd服務
如果使用yum的方式安裝httpd的話還需要安裝軟件包httpd-devel.軟件包,因為當安裝php5時需要用到
3, 安裝mysql
(1),解壓mysql文件
#tar –xf mysql-5.1.50-linux-i686-glibc23.tar.gz –C /usr/local/
#ln mysql mysql-5.1.50
# cd mysql-5.1.50
(2)由於mysql是綠色軟件所以不需要安裝,下面我們將鏈接mysql的頭文件,庫文件和幫助文件
A,鏈接mysql的頭文件
# Ln –sv /usr/local/mysql/include /etc/include/mysql
B,設置環境變量
#vim /etc/profile
在文件裡加入 PATH=$PATH:/usr/local/mysql/bin
C,鏈接mysql的幫助文件
#vim /etc/man.conf
在文件裡面加入
MANPATH /usr/local/mysql/man
保存並退出
4, 安裝並配置php5
(1) 解壓php5
#tar -xf php-5.3.5.tar.bz2
#cd php
(2) 配置./configure
#./configure –prefix=/usr/local/php5 –sysconfdir=/etc/php5 –with-mysql=/usr/mysql –with-apx2=/usr/local/apache/bin/apxs
(3) 編譯並安裝php5
#make
#make install
(4) 在httpd.conf中配置php5的支持選項
打開httpd.conf文件
#vim /httpd/httpd.conf
在文件中輸入以下幾行
Addtype application/x-httpd-php .php
Addtype application/x-httpd-php-source .phps
找到DirectoryIndex index.html 在其後添加index.php
5,安裝phpwind,phpbb3,wordpress ,discuz等論壇軟件
(1),創建四個基於域名的虛擬主機分別為www.phpwind.com www.eordpress.com www.phpbb3.com www.discuz.com