這裡和:Add-AppxPackage : 部署失敗,原因是 HRESULT: 0x80073CF6, 無法注冊包。錯誤 0x8000FFFF: 由於出現意外錯誤,添加磁貼失敗。有關(當你powershell執行命令Get-AppXPackage -AllUsers | Foreach {Add-AppxPackage -DisableDevelopmentMode -Register "$($_.InstallLocation)\AppXManifest.xml"}時)
這是因為一個數據庫的損壞導致的,同時這個數據庫也跟開始菜單的正常與否有關,要解決這個問題只能通過刪除C:\Users\Administrator\AppData\Local\TileDataLayer\Database,才能行,同時也解決了開始菜單沒反應的問題。請看往下,你會了解有關系的這麼一過程:
方法一:
1、進入C:\Users\你的登錄名\AppData\Local\TileDataLayer\Database,刪除掉vedatamodel.edb這個文件,也可以刪除Database整個文件夾
2、你會發現點擊菜單,什麼都沒有。但是開始菜單已經有反應了
注銷或重啟之後:
它會產生所有應用的列表。但是微軟本身的應用沒有了。所以只能通過powershell管理員執行命令Get-AppXPackage -AllUsers | Foreach {Add-AppxPackage -DisableDevelopmentMode -Register "$($_.InstallLocation)\AppXManifest.xml"}了
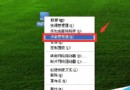
它會在所有應用列表那裡產生圖標,但是磁貼還是空的,這要看你的需要了:在所有應用列表一個個找,並通過右鍵選擇,固定到開始屏幕
3、可能需要到新建賬戶:這裡有可能關系到以下引用經驗,當你登錄不了遇到User Profile Service服務未能登錄,無法登錄的時候要用到的。當兩個賬戶用同一主文件夾時(也就是用同一配置文件)
表現為動態鎖定(備份狀態的)配置文件的,如果是互鎖的文件,導致只能一個登錄,登錄一賬號則變為對方狀態(包括備份狀態的配置文件文件、配置文件大小(反轉的相補狀態)、注冊表裡面也會動態改變、等各種信息)
4、要可能結合引用經驗並更改主文件夾權限才得,目前不知對不對。87User Profile Service服務未能登錄,無法登錄
方法二、新建賬戶替換vedatamodel.edb法
1、新建一個新帳戶,用戶組選項設置為管理員;
1)登錄新建的用戶;
2)回到原來賬戶(出問題的),從C:\Users\新的用戶名\AppData\Local\TileDataLayer\Database,復制出vedatamodel.edb
3)進入新的賬戶,再把復制出來的vedatamodel.edb復制到C:\Users\出問題的用戶名\AppData\Local\TileDataLayer\Database下。可以了。總之就是用新建的正常賬戶的Database替換出問題的賬戶的Database
2、新建賬戶的話也可以通過粘貼命令,(TempAdmin1替換為你將要設置的用戶名,password1替換為你將要設置的密碼)
1)首先通過win+x再選擇命令提示符(管理員)A
復制內容到剪貼板
- net user "TempAdmin1" "password1" /add
-
- net localgroup administrators "TempAdmin1" /add
之後刪除新建的賬戶就可以了
英文原版:
復制內容到剪貼板
- Login to your current profile
-
- Press Win+X, and select "Command Prompt (Admin)"
-
- Enter the following commands, in this order
-
- net user "TempAdmin1" "password1" /add
-
- net user "TempAdmin2" "password2" /add
-
- net localgroup administrators "TempAdmin2" /add
-
- Press Ctrl+Alt+Del, click Sign Out
-
- Login to the "TempAdmin1" account using password "password1"
-
- Logout, and then login to the "TempAdmin2" account, using "password2" (note: you must fully sign out, not just switch users)
-
- Open File Explorer, select View, then check the box marked "Hidden Items"
-
- Navigate to C:\Users\TempAdmin1\AppData\Local\TileDataLayer (click "continue" to gain access when prompted)
-
- Right Click the folder "Database" & Copy
-
- Now, navigate to the same folder for your damaged profile (C:\Users\YOUR_USERNAME\AppData\Local\TileDataLayer)
-
- Right click "Database", and rename to "Database.BAD"
-
- Right click empty area in the folder, and select Paste
-
- Reboot, then sign back in with your original profile.
-
- Now, assuming all is well, you want to delete the two accounts you created:
-
- Win+X → Control Panel → User Accounts → Manage Another Account
-
- Select Account, then "Delete Account"
-
- Brief explanation:
-
- Your TileDataLayer database is damaged
-
- You need a new TileDataLayer database
-
- Create a new user (user A), and login with it (a new database will be created). Proceed with this procedure only if the Start Menu and all other apps are working correctly as user A.
-
- Because the database is locked when you're logged in, you create user B (with access to user A's profile and your user profile)
-
- Rename the old database, and copy the new database from user A to your profile
-
- Logout from user B, and your account should work again
相關推薦:
解決win10打不開開始菜單和消息欄的辦法
最簡單快速解決win10開始菜單消失或打不開的問題
win10開始屏幕怎麼自己設置?win10開始菜單設置的教程